Introduction
Today, I'll be demonstrating the Class Timetable module — used to create and manage the weekly teaching schedule for each class.
This timetable is the core schedule followed by students, class teachers, and subject teachers.
📍 Navigating to Class Timetable
To access this feature:
Go to Timetable in the sidebar
Then select Class Timetable
This page allows us to view, edit, and publish timetables for each class and section.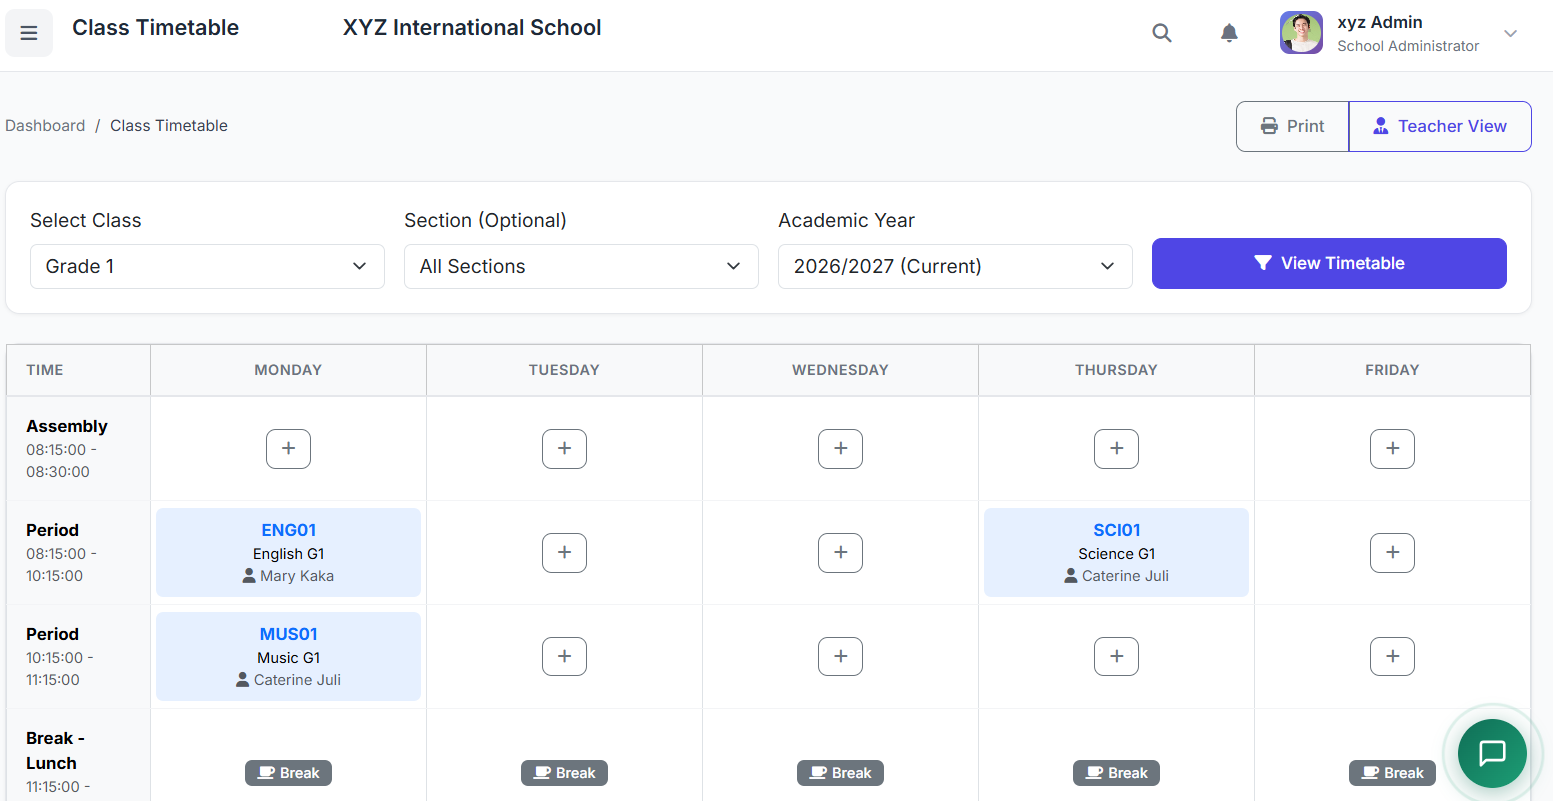
🧠 Understanding the Timetable Structure
A class timetable is structured by:
| Component | Description |
|---|---|
| Days of the week | e.g., Monday to Friday |
| Time slots | Configured earlier in the system |
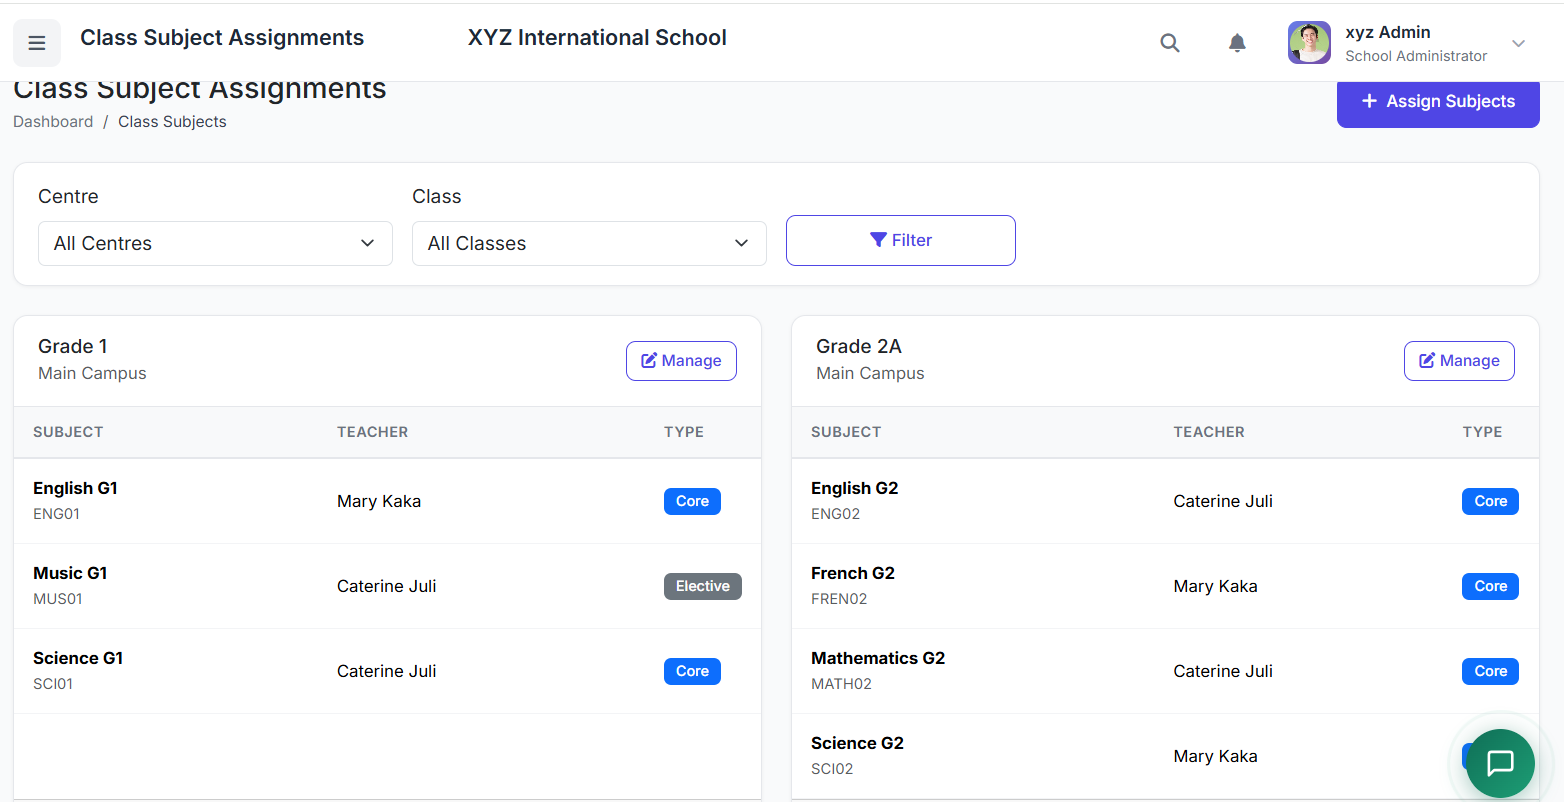
Each cell in the timetable represents a combination of teacher and subject assigned to a specific class, day, and period.
📋 Class Timetable Page Overview
At the top of the page:
Select the Class
Select the Section
Once selected, the weekly timetable grid is displayed, showing all days and periods for that class.
✏️ Creating or Editing a Class Timetable
Step 1: Enable Editing
To start creating or modifying the timetable:
Click Edit Timetable (or the grid becomes editable automatically)
Step 2: Adding Timetable Entries
Click on an empty slot in the timetable
A popup appears — select the Subject
Based on the subject selected, the system automatically limits the Teacher list to only those assigned to that subject and class
Save the entry — it now appears in the timetable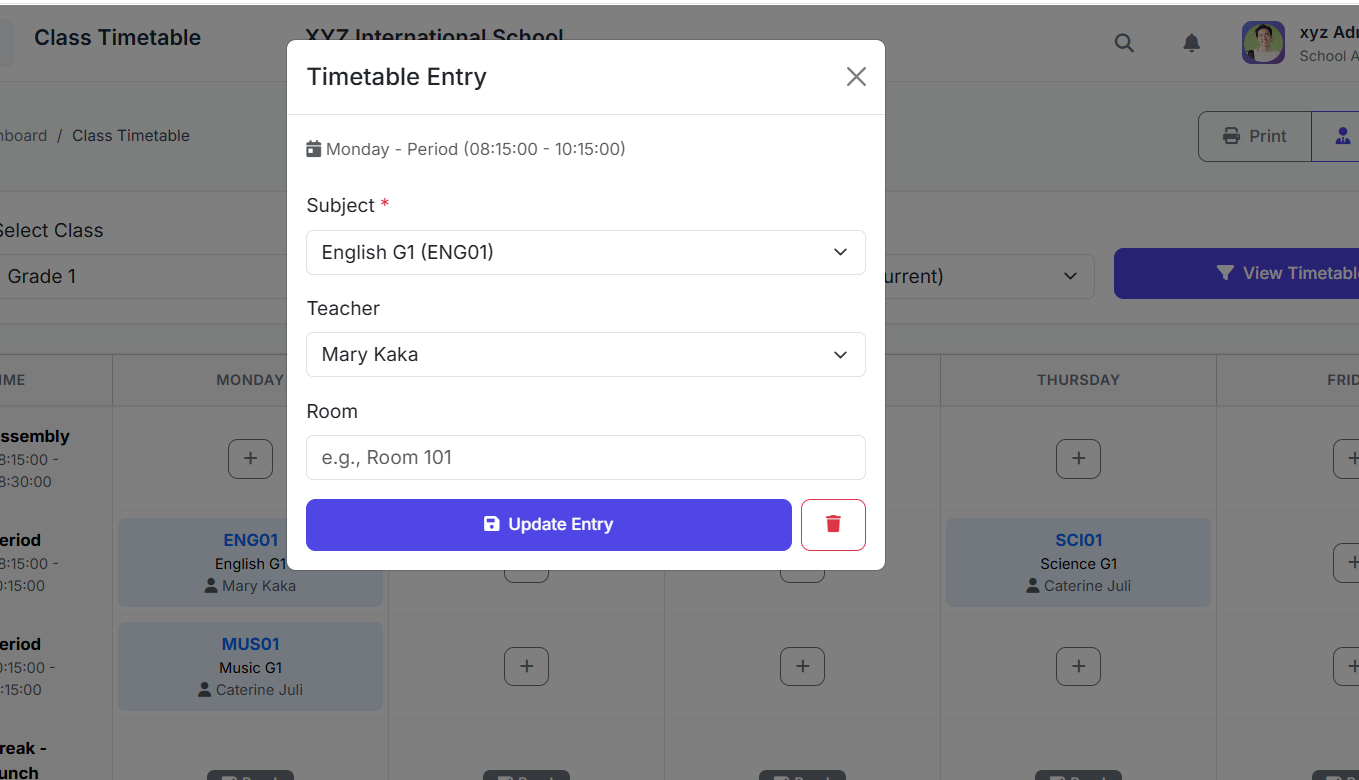
Click on an empty slot in the timetable
A popup appears — select the Subject
Based on the subject selected, the system automatically limits the Teacher list to only those assigned to that subject and class
Save the entry — it now appears in the timetable
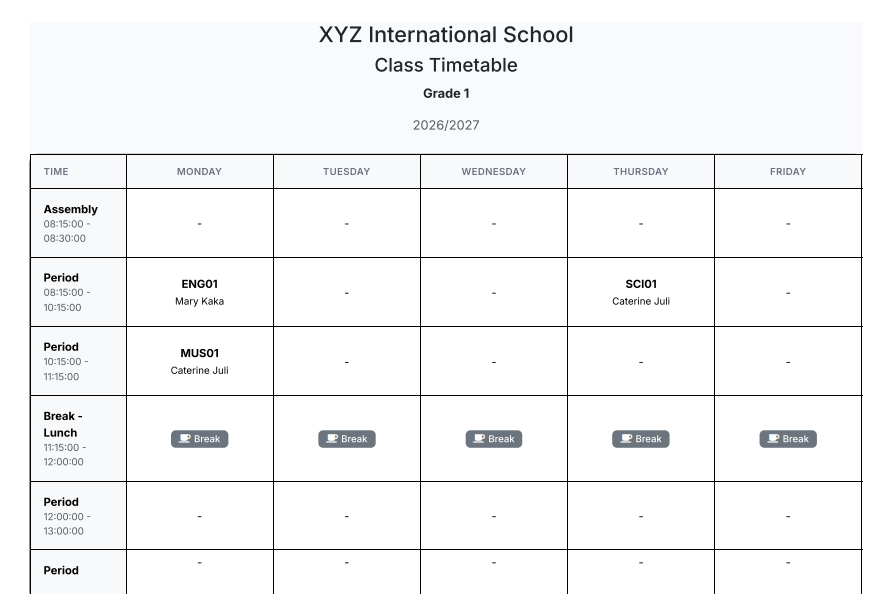
📅 Example Timetable Walkthrough
Day Period Subject Teacher Monday Period 1 English Mrs. Kaka Monday Period 2 Music Mrs. Caterine ... ... ... ...
This process is repeated until all required periods are filled.
| Day | Period | Subject | Teacher |
|---|---|---|---|
| Monday | Period 1 | English | Mrs. Kaka |
| Monday | Period 2 | Music | Mrs. Caterine |
| ... | ... | ... | ... |
This process is repeated until all required periods are filled.
🍽️ Break and Lunch Periods
Feature Description Appearance Automatically shown as blocked or shaded slots Assignments Cannot have teacher assignments Labeling Clearly labeled to avoid scheduling mistakes
| Feature | Description |
|---|---|
| Appearance | Automatically shown as blocked or shaded slots |
| Assignments | Cannot have teacher assignments |
| Labeling | Clearly labeled to avoid scheduling mistakes |
✏️ Editing and Removing Timetable Entries
Action How to Do It Edit Click on the entry → Modify subject or teacher → Save Remove Click on the entry → Click Remove or Clear → Slot becomes empty
| Action | How to Do It |
|---|---|
| Edit | Click on the entry → Modify subject or teacher → Save |
| Remove | Click on the entry → Click Remove or Clear → Slot becomes empty |
⚠️ Conflict Detection and Warnings
The system actively checks for conflicts:
| Conflict Type | Prevention |
|---|---|
| Teacher conflict | Prevents assigning the same teacher to multiple classes at the same time |
| Room conflict | Warns if rooms are used simultaneously |
| Teacher availability | Alerts if no valid teacher is available for a selected subject |
🖨️ Printing and Publishing the Timetable
Printing
Once the timetable is ready:
Click Print
Print directly or save as PDF
Publishing
After reviewing all entries:
Click Publish
Timetable becomes visible to students, parents, and teachers
Notifications can be sent automatically
✅ Best Practices
Practice Why It Matters Complete teacher-subject assignments first Ensures teachers are available for scheduling Start scheduling core subjects before electives Prioritizes essential classes Balance subjects across the week Prevents clustering of difficult subjects Avoid placing demanding subjects back-to-back Supports student focus and energy Review timetable with teachers before publishing Catches issues early Keep room for adjustments Allows flexibility for changes
| Practice | Why It Matters |
|---|---|
| Complete teacher-subject assignments first | Ensures teachers are available for scheduling |
| Start scheduling core subjects before electives | Prioritizes essential classes |
| Balance subjects across the week | Prevents clustering of difficult subjects |
| Avoid placing demanding subjects back-to-back | Supports student focus and energy |
| Review timetable with teachers before publishing | Catches issues early |
| Keep room for adjustments | Allows flexibility for changes |
🏁 Closing
That concludes our demonstration of the Class Timetable module.