🎯 Module Overview
In this tutorial, we'll look at the introduction to managing school transportation, including setting up bus routes, defining stops, and getting an overview of transport operations.
The Transport Management module centralizes all school transportation logistics. It enables administrators to define bus routes, manage pickup/drop-off points, assign students and vehicles, track daily attendance, and generate operational reports.
🧭 How to Access
Navigate to: Transport → Transport Management
This opens the Transport Dashboard.
📊 Transport Dashboard
Get an immediate operational snapshot:
| Metric | Description |
|---|---|
| Total Routes | Number of active bus routes defined. |
| Total Stops | Combined count of all pickup/drop-off points. |
| Assigned Students | Number of students currently using the transport service. |
| Active Vehicles | Buses currently in operation. |
Core Features accessible from the module:
Routes & Stops Management
Student Assignments
Transport Attendance
Reports

🛣️ Managing Routes & Stops
Understanding the Structure:
Route: The complete journey path of a bus (e.g., "North Zone Route").
Stop: A specific location along that route where students are picked up or dropped off, arranged in a Sequence.
Accessing the Routes List:
Navigate to: Transport → Routes (or via the dashboard link).
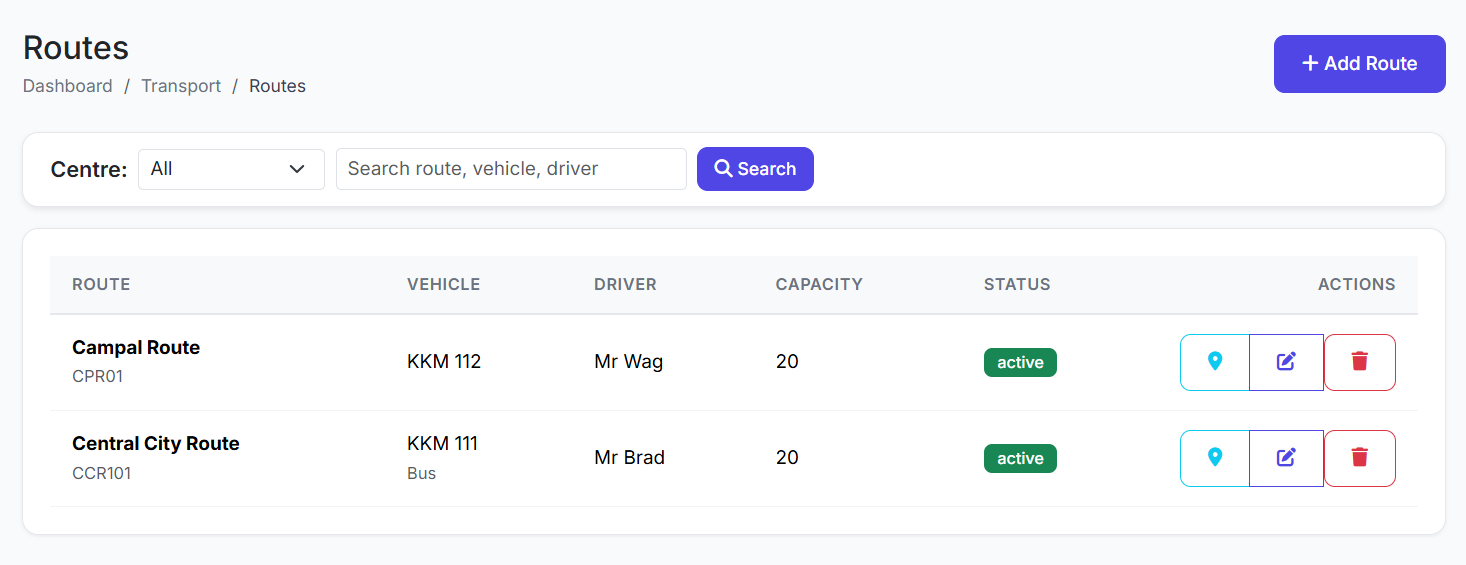
📋 Routes List Page:
View all configured routes. Key columns include:
Route Name & Code
Assigned Vehicle & Driver
Number of Stops
Assigned Students
Status (Active/Inactive)
Actions (View, Edit, Manage Stops)
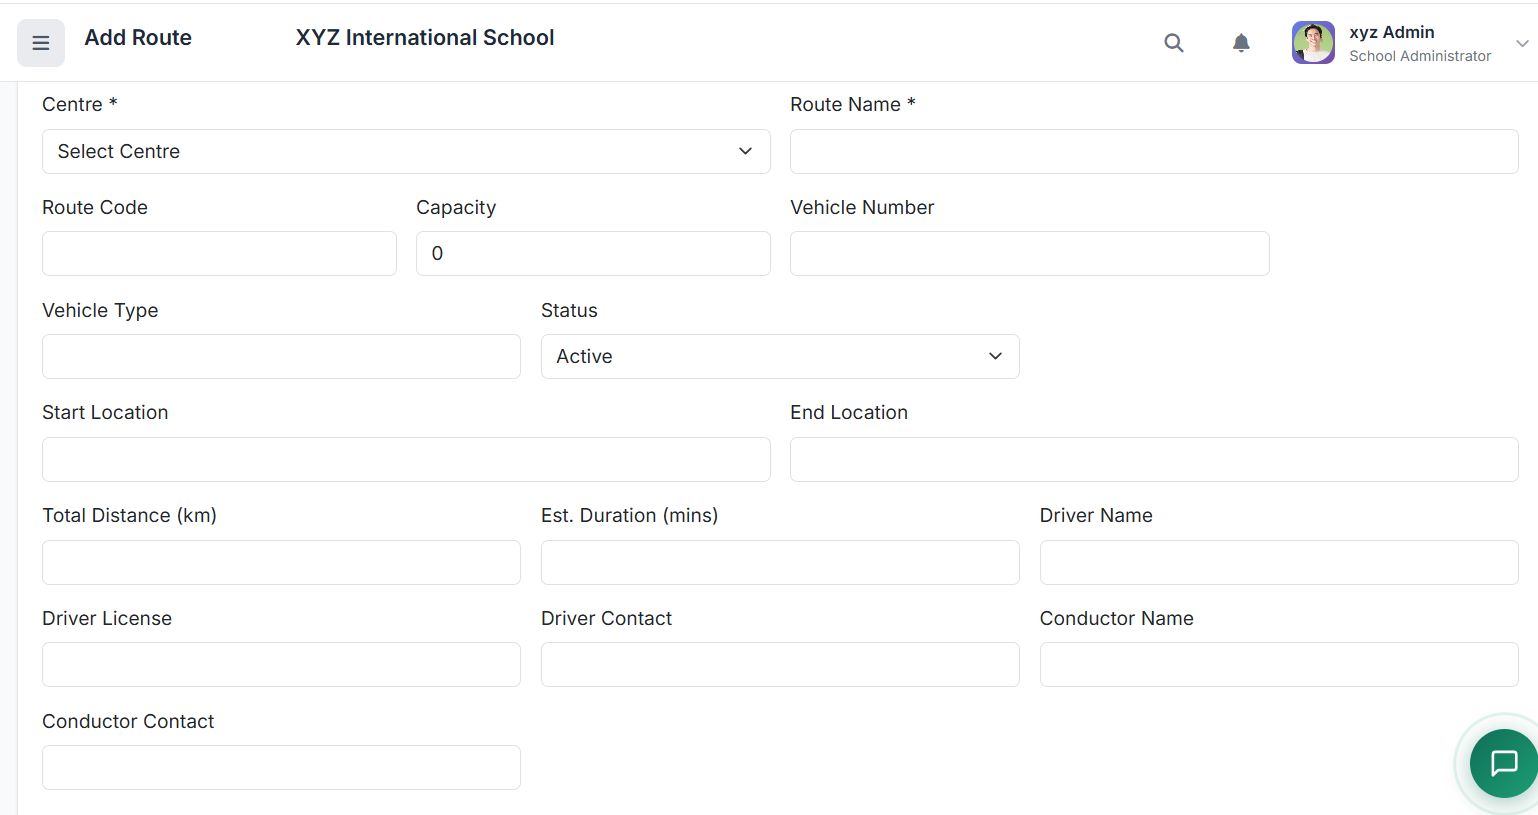
➕ Creating a New Route
Click Add Route.
Fill in the form:
Route Name (e.g., "Central City Loop")
Route Code (e.g., "CCL01")
Vehicle Number (Optional: assign now or later)
Driver Name & Phone (Optional)
Monthly Fee (If transport is fee-based)
Status: Set to Active.
Click Create Route.
Result: The route is created and appears in the list. The next step is to add stops.
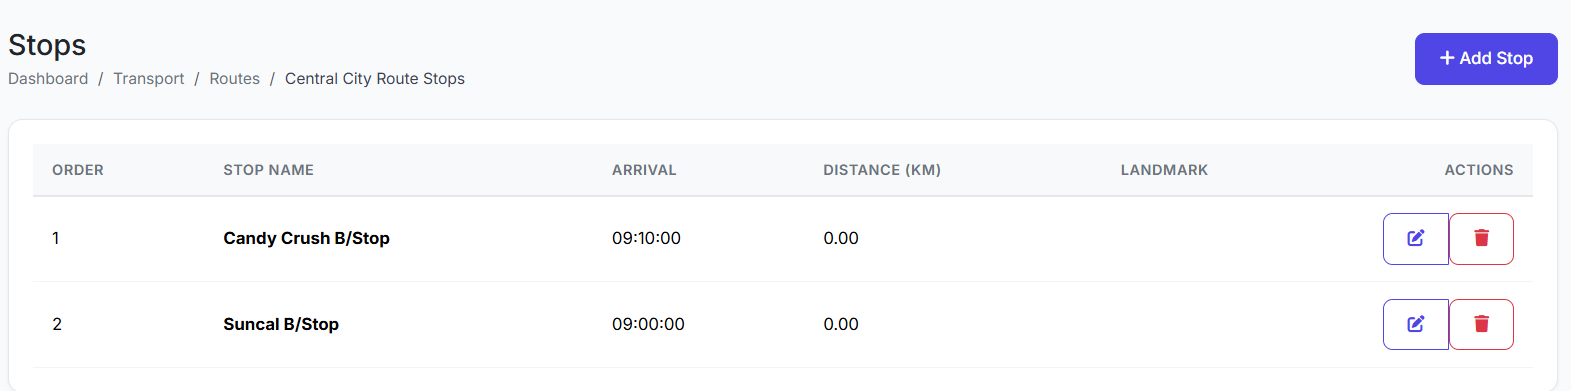
🚏 Adding Stops to a Route
From the Routes list, click Manage Stops or View on the desired route.
Click Add Stop.
Fill in the stop details:
Stop Name (e.g., "Maple Street Bus Stop")
Sequence Number (The order in the route, e.g., 1, 2, 3)
Pickup Time (When the bus arrives in the morning)
Drop Time (Optional: When the bus returns in the afternoon)
Landmark/Address (Optional details for clarity)
Click Add Stop.
Repeat for all stops along the route.
👀 Viewing Route Details
Opening a route shows:
A list of all stops in sequential order.
Assigned students per stop (once assignments are made).
Potentially, a visual route map if the system supports GIS integration.
✅ Best Practices for Route Setup
Logical Sequencing: Order stops sequentially based on the bus's actual travel path to optimize time and fuel.
Clear Stop Names: Use recognizable names that include a landmark (e.g., "Post Office Stop") for easy identification by parents and drivers.
Realistic Timing: Set Pickup/Drop Times with buffer for traffic; review and adjust periodically.
Driver & Vehicle Info: Keep driver contact and vehicle details updated for emergency communication.
Setting up Routes and Stops is the foundational step in managing school transport. It creates the framework for assigning students, tracking attendance, and monitoring the entire transportation system.
Next, we will cover Assigning Students to Transport and Tracking Transport Attendance.